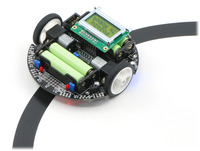
The 3Pis is a small completed robot with all the parts from previous modules
It has a buzzer, motors, line/distance sensors and LEDs.
Top view:
Bottom View:
The easiest way to program the 3Pi is using Arduino and Anibit's free graphical programming tool. To set these things up see the post about 3Pi software. The installable Anibit program might be a bit trickier to set up and only works on Windows. Another way to use it is to copy your code from The Anibit online tool.
To get started lets make the robot move forward and backward a few times, we'll also display the current battery level in millivolts (5 volts = 5000 millivolts).
Note: we need to display the battery level.
If you program on a battery level near or below 5000mV you can destroy your robot.
Here are the blocks we will use:
- Math is where you get number blocks to plug into other slots.
- From Arduino the Setup block is similar to Ardublock: it runs the code inside just once
- From Motors the Set Motors block sets the power level of the motors between 0 and 255. Faster speeds will drain your batteries. If you're moving you'll need a Delay to tell the robot how long to keep moving (in milliseconds: 1000 * second).
- From Display you can get blocks to put words on the robot's screen. Try adding the battery level from 3Pi Analog.
- If you turn on the motors, don't forget to turn them off by setting them back to 0!
Open up the regular Arduino program and paste in your code (Shortcut: use <Ctrl>+<V> to paste).
Make sure you have selected:
- Tools > Board > Pololu ... 3Pi robot w/ ATmega328P
- COM4 (if this doesn't work ask somebody for help- you have to check 'devmgmt.msc' to find the right one)
- Programmer > Pololu USB AVR Programmer
If you're all set turn on your robot and hit upload!


No comments:
Post a Comment